(This is part two of a series on creating the ultimate dessert bar. Find part one on the dessert bar basics here.)
Before the desserts tempt you guests’ sweet tooth, you will want the beautiful styling of the table to be the eye candy that draws them over. (It’s also just a good excuse to create another amazing styled moment. As if you needed one?) Some of the most beautiful elements of the most beautiful dessert bars are the table props, backdrops and styling flourishes. Extra attention to detail here will really make your dessert bar pop. Read on for our tips and suggestions on how to style your table like a pro.
Tip #1: Room Placement, Lighting, Accessibility
It may sound obvious, but I’ve set up quite a few weddings that didn’t fully realize the significance of these three factors, resulting in beautifully styled dessert bars hidden in dark corners and photographs pocked by unfortunate wall markings (thermostats, electrical wires, venue advertisements, etc.) Something I have really learned in this business is that good photographs aren’t a guarantee: you have to set the scene for them, so:
- Make sure you choose a spot that has plenty of light and that the wall flanking your bar is free of any eyesores (or that you will be able to hide any that may exist with your backdrop and styling details).
- Make sure you choose a spot that has plenty of light and that the wall flanking your bar is free of any eyesores (or that you will be able to hide any that may exist with your backdrop and styling details).
- Consider guest accessibility as well. Dessert bars imbibe a solicitous, come-and-go vibe, and you want your guests to be able to snack between dance party breaks, so make sure that there is plenty of room and access from both sides to your bar. Placement near the dance floor and bar areas are ideal.
Tip #2: Get Creative with Serving Pieces
A truly beautiful dessert will look amazing no matter what it is served on, but here we are talking about taking it to that next level of knock-your-socks-off styling. The classic approach is to forage or rent a collection of lovely milk glass cake stands, and this can be utterly beautiful. BUT. If you’re looking for something a little different and equally as charming (which of course you are because you’re here!), try some of these ideas:
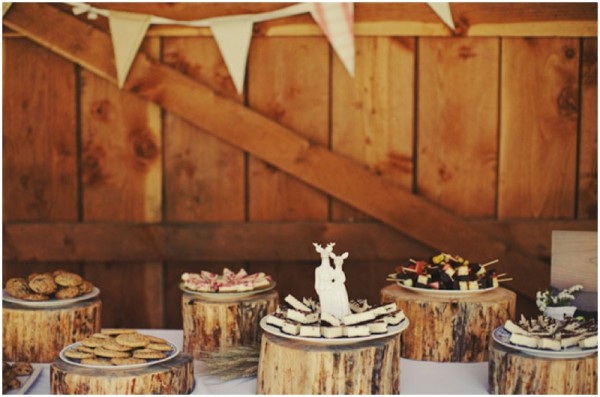
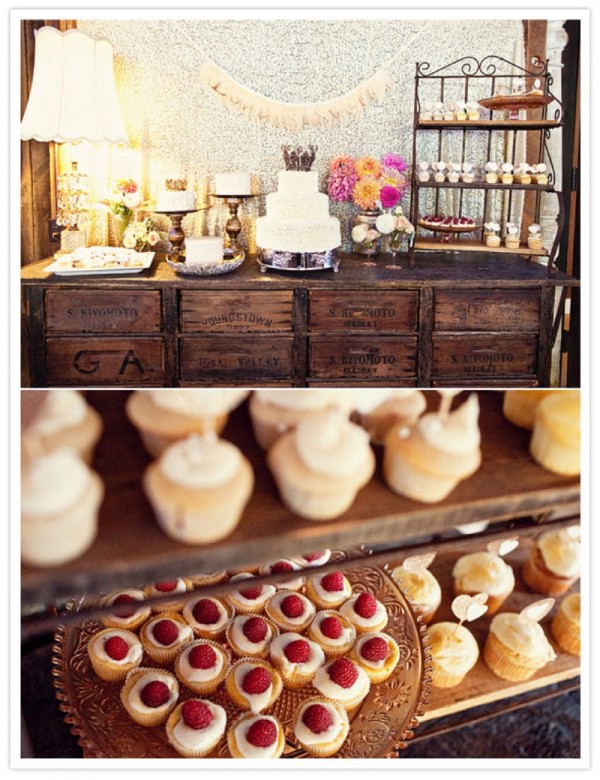
For something Rustic:
- mix up materials: galvanized stands, vintage silvers and coppers, woods and whites look beautiful together
- use wooden slabs of varying thickness (alone, turn them into cake stands, or layer them with cake stands)
- rent vintage wooden crates, egg boxes and scales as props
- beautiful woodcut platters and cutting boards with vintage silver
- berry baskets paired with vintage hankies are always lovely
- rent interesting furniture pieces in place of tables
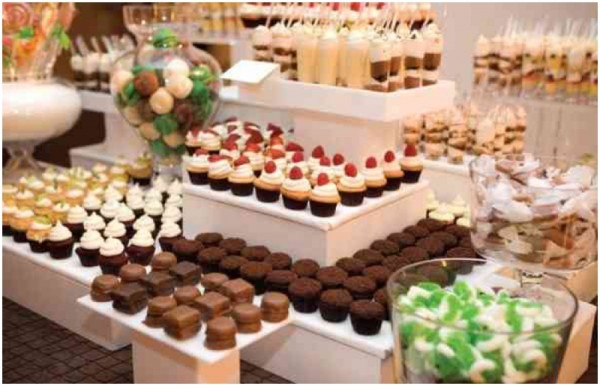
For something Modern:
- acrylic stands come in all shapes and sizes (really. for anything from cake pops to macaron towers to cake knives)
- BHLDN and the like carry some striking unusual stands inspired by everything from sea creatures to royal parties
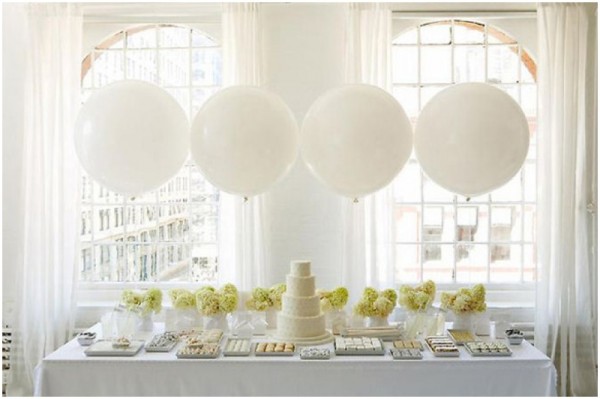
- pair statement pieces like cut geode platters or artisan ceramics with understated white (more affordable) pieces.
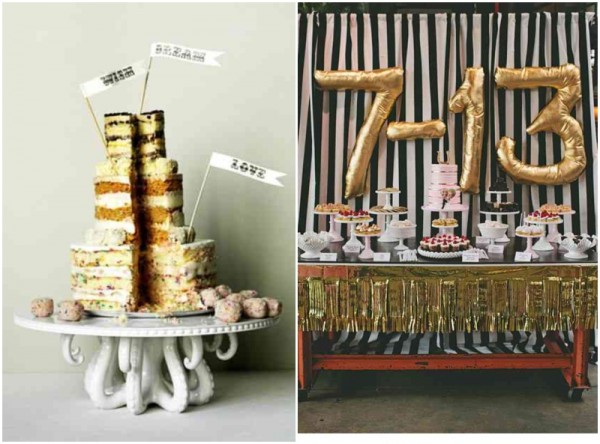
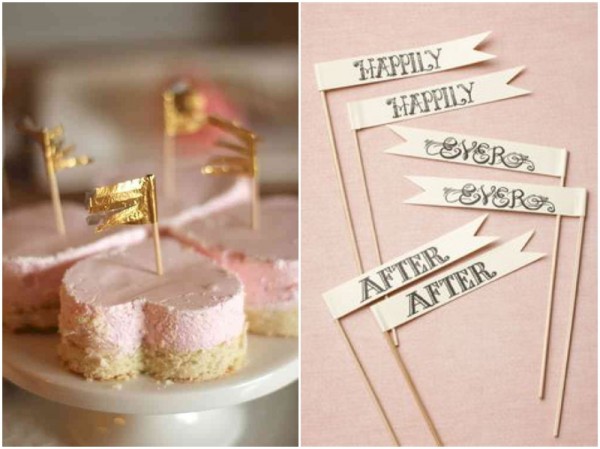
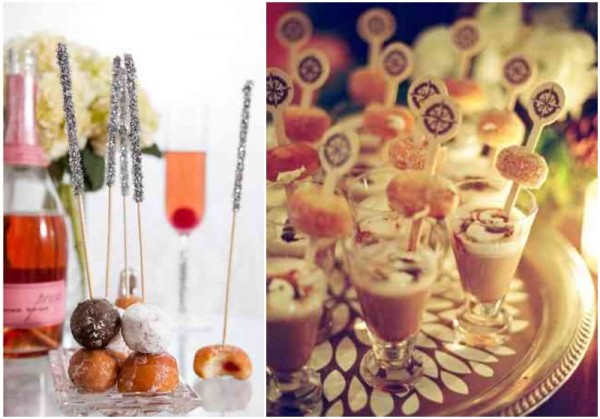
Tip #3: Accessorize your Desserts!
With the cupcake revolution came an influx of adorable cupcake picks, and hence a ton of DIY projects for crafting little cute things to stick into your dessert of choice. Some of our favorites include:
- washi tape flags
- bunting banners
- calligraphy pennants
- paper flags
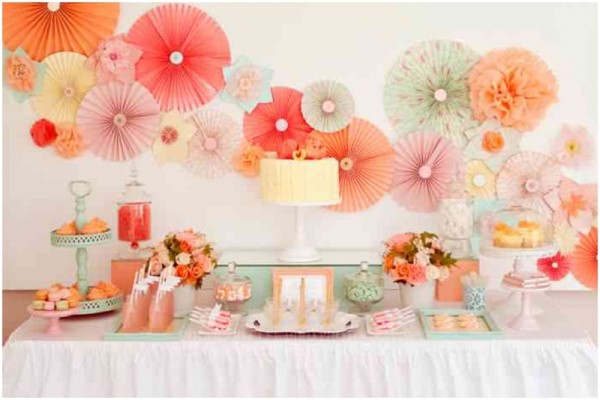
- pinwheels
- lace cutout doilies
- gingham wrappers
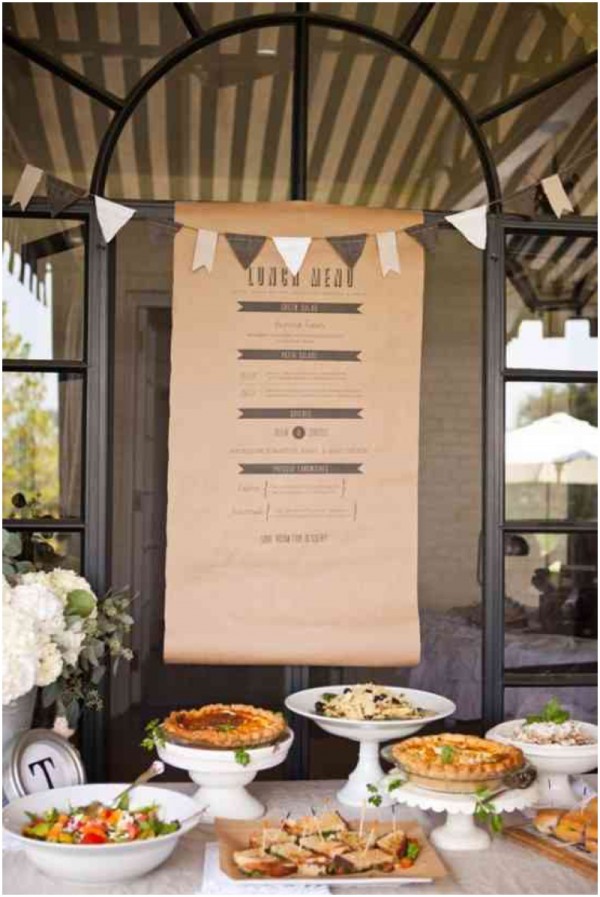
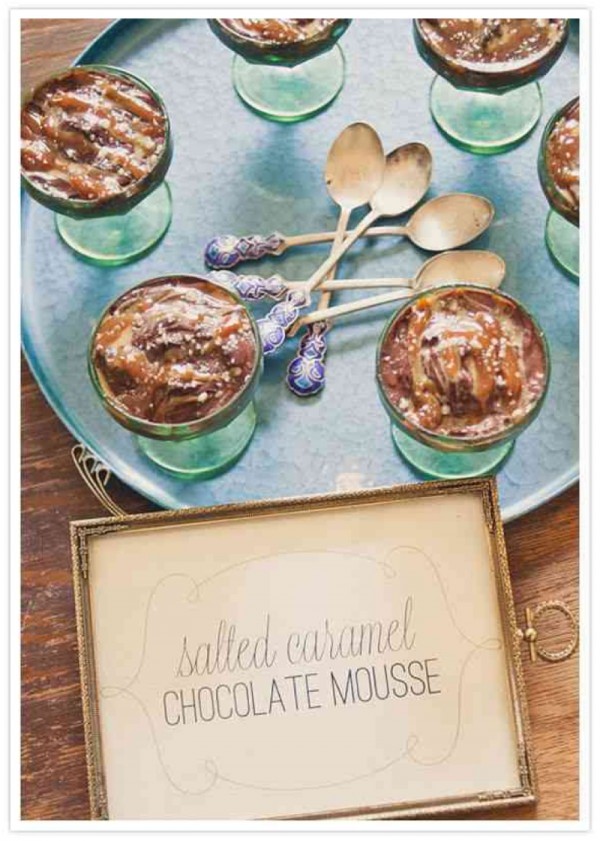
Tip #4: Don’t Forget the Menu Cards
A menu of some sort for your dessert bar is key; while some items are easily recognizable, others may be new to guests and flavors disguised. You will most likely not have enough items for everyone, so you’ll want to make sure guests can make an educated favorite choice. It really comes down to two options here: small menu cards/labels placed at each stand/platter, or a big pretty menu that everyone can see. (Again, we recommend working with a calligrapher or paper designer to create something custom.)
Tip #5: Fill in with Florals
Whether it’s custom garlands of greens, small collections of bud vases, over-the-top arrangements, or random touches of cut blooms, when in doubt – always embellish with florals! Flowers have a way of filling in any gaps and adding so much color to an otherwise neutral and dry area. If you don’t want to spend the extra crafting time with paper accents, fresh flowers are the way to go. Work with your florist, and connect she/him to your baker and planner so that they can tie it all together.

Sources: Martha Stewart Weddings // BHLDN // 100 LayerCake // Green Wedding Shoes // Southern Weddings // One Charming Party // Roost // Ritzy Bee Blog // Mrs. Lilien // Style Me Pretty